Skip to content
Details

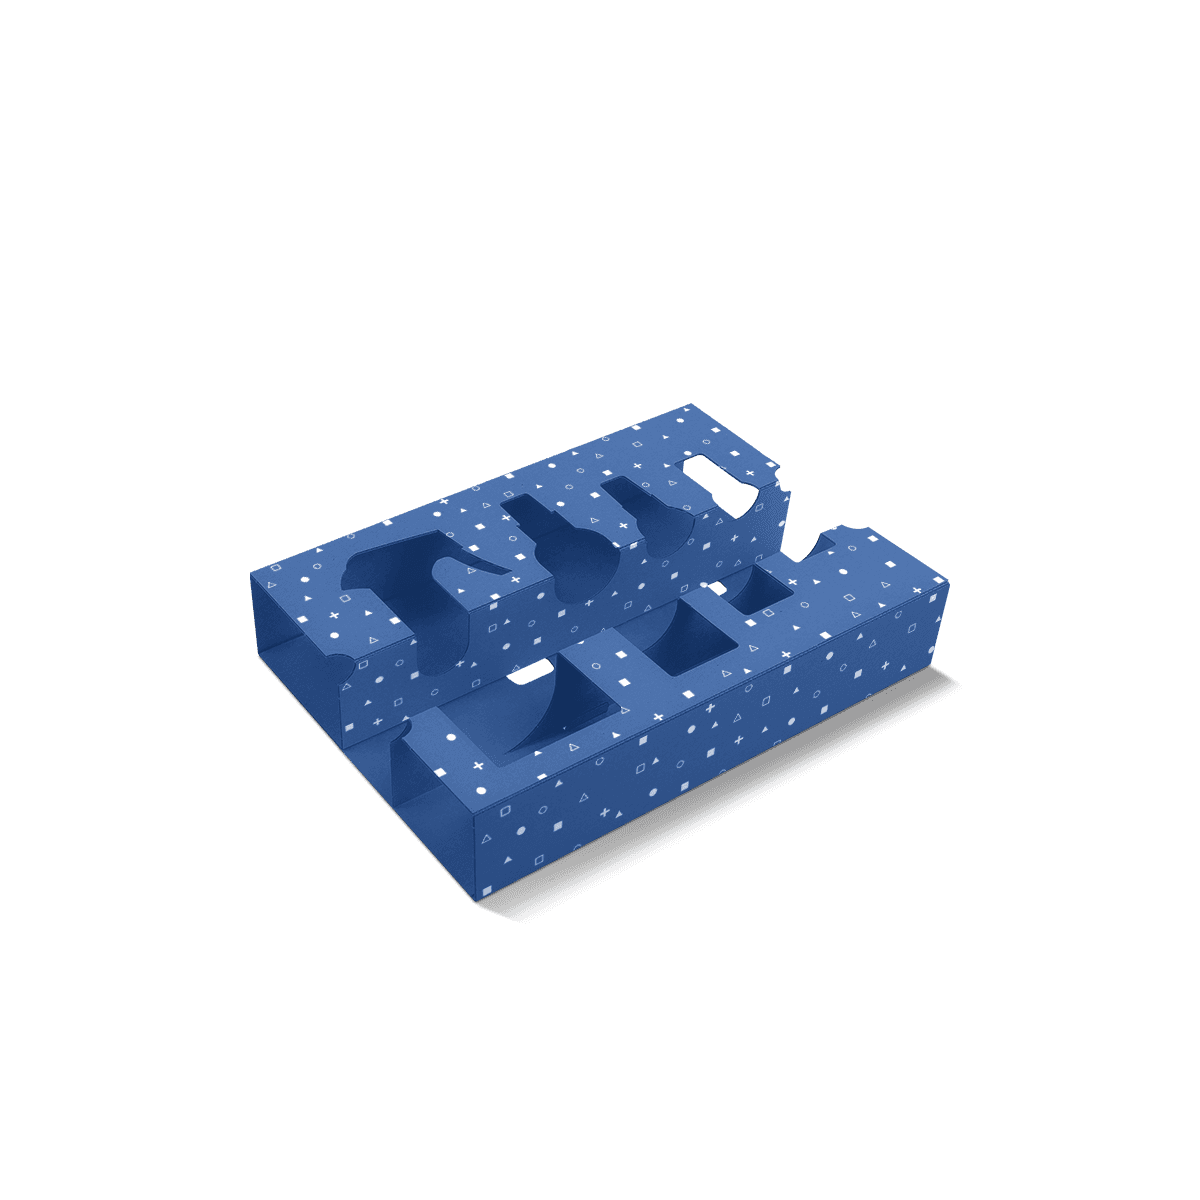
Custom Cosmetic Box Inserts

Made-to-fit supports for bottles, jars, palettes and beauty sets, planned around safe contact points, cavity depth, removal and repeat packing.

The Insert Is the Internal Architecture

The outer box protects the presentation, but the insert decides where every beauty product actually sits. Custom Cosmetic Box Inserts should control orientation, movement and reveal without gripping decorated glass, pumps, mirrors or labels at vulnerable points.

The key difference from general Inserts and Dividers is the beauty-specific brief. Cosmetic products often combine decorated glass, pumps, mirrors, labels, delicate caps and several different shapes in one presentation. The insert has to support those products without scuffing visible surfaces or making them difficult to remove.

Within Custom Cosmetic Packaging, the insert should be planned at the same time as the outer box. Adding one after the carton or rigid box has already been fixed can create unnecessary depth, poor lid clearance or cavities that are too tight.

Start With Product Orientation

Before drawing cut-outs, decide exactly how each product should face when the pack is opened. Orientation affects the cavity shape, the loading sequence and the amount of visible branding.

Choose the Customer-Facing Side

A skincare bottle may need its front label facing upward. A compact may present better with the lid facing the customer. A perfume miniature may need to stand vertically rather than lie flat.

Those decisions should be fixed before the insert is engineered. If orientation changes later, the cavity, finger access and spacing may all need to change with it.

Mark No-Contact Areas

Not every part of a cosmetic product should be used as a grip point. Avoid pressing tightly against pump heads, droppers, mirrored edges, decorated caps, raised labels or surfaces that can scuff.

A good insert holds the product through safer areas of the body or base. This matters particularly for Perfume Boxes, where dense glass and decorative closures can make a visually neat but badly placed contact point risky.

Cavity Depth Sets the Reveal

How deeply a product sits changes both protection and presentation. Cosmetic inserts should position the item deliberately rather than simply make it fit.

Too Deep Hides the Product

If a jar or compact drops too far below the insert surface, the customer sees a hole before they see the product. Deep cavities can also make small items awkward to grip.

Raise the product enough for its identity and shape to read clearly while keeping sufficient support around the sides.

Too Shallow Adds Pressure

A product that sits too high can contact the lid or top flap when the box closes. That may mark a cap, press a pump or stop a rigid lid from sitting correctly.

The insert depth therefore has to be checked against the closed outer box, not judged only with the lid open.

Beauty Products Need Different Holds

One insert pattern should not be stretched across every cosmetic product. Weight, shape and vulnerable points change how the support should work.

Bottles and Droppers

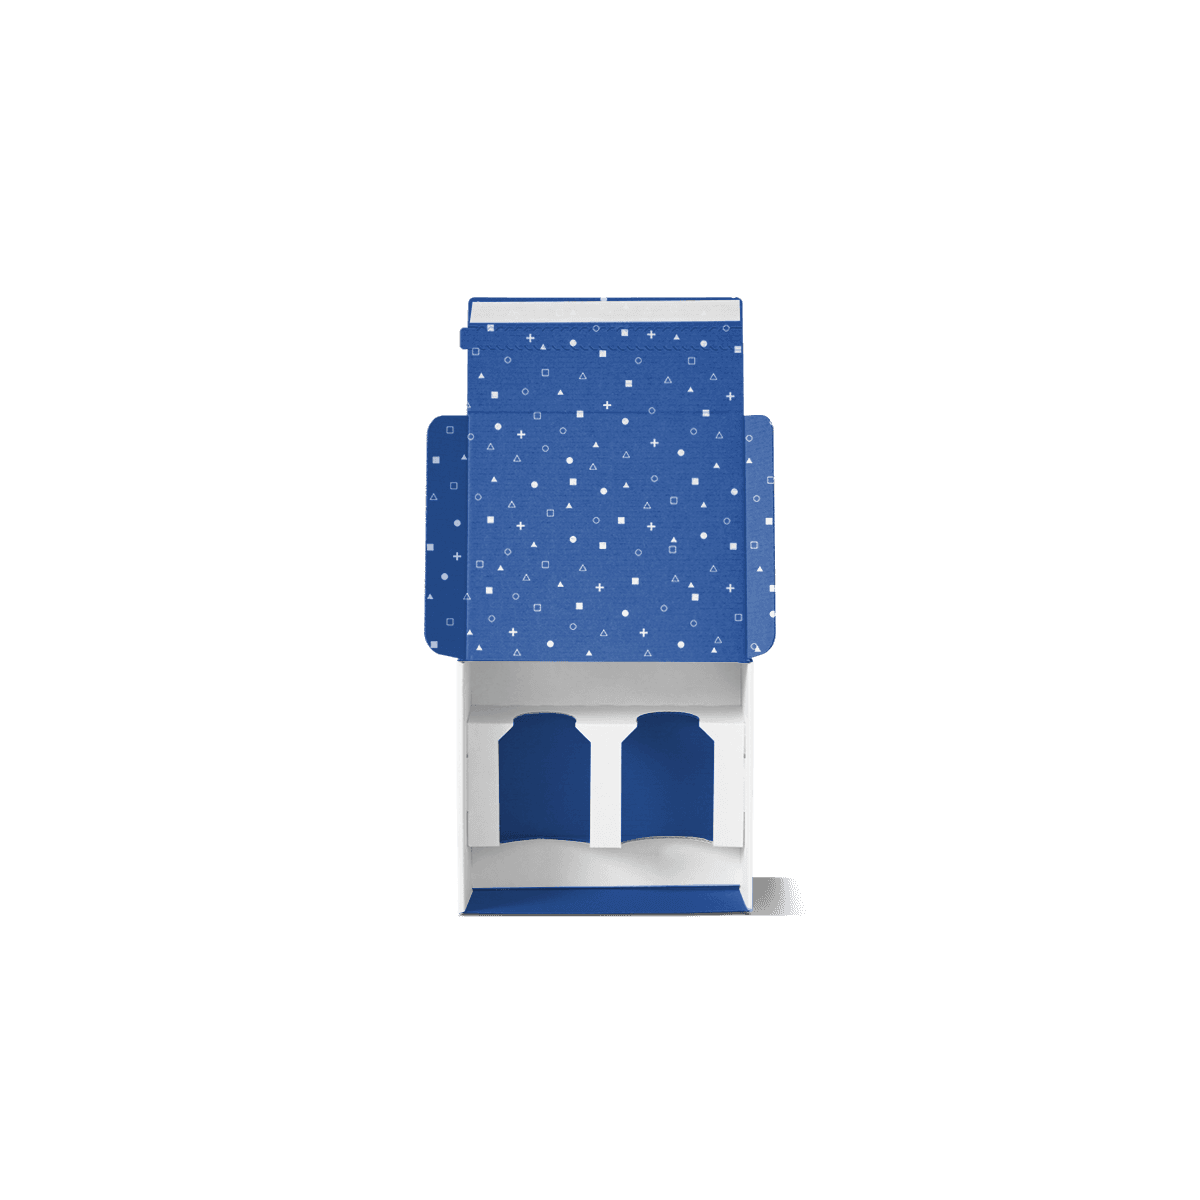
Tall bottles can tip even when their footprint fits the cavity. A lower-body cradle, neck support or shaped opening can help keep them upright without gripping the dropper or pump.

For Skincare Boxes, this becomes useful when glass serums, lotions or treatment bottles need consistent positioning inside cartons or presentation sets.

Jars and Compacts

Wide jars usually need good base support rather than a tight grip around the lid. Compacts can need edge control, especially when mirrors or pressed products make knocks more consequential.

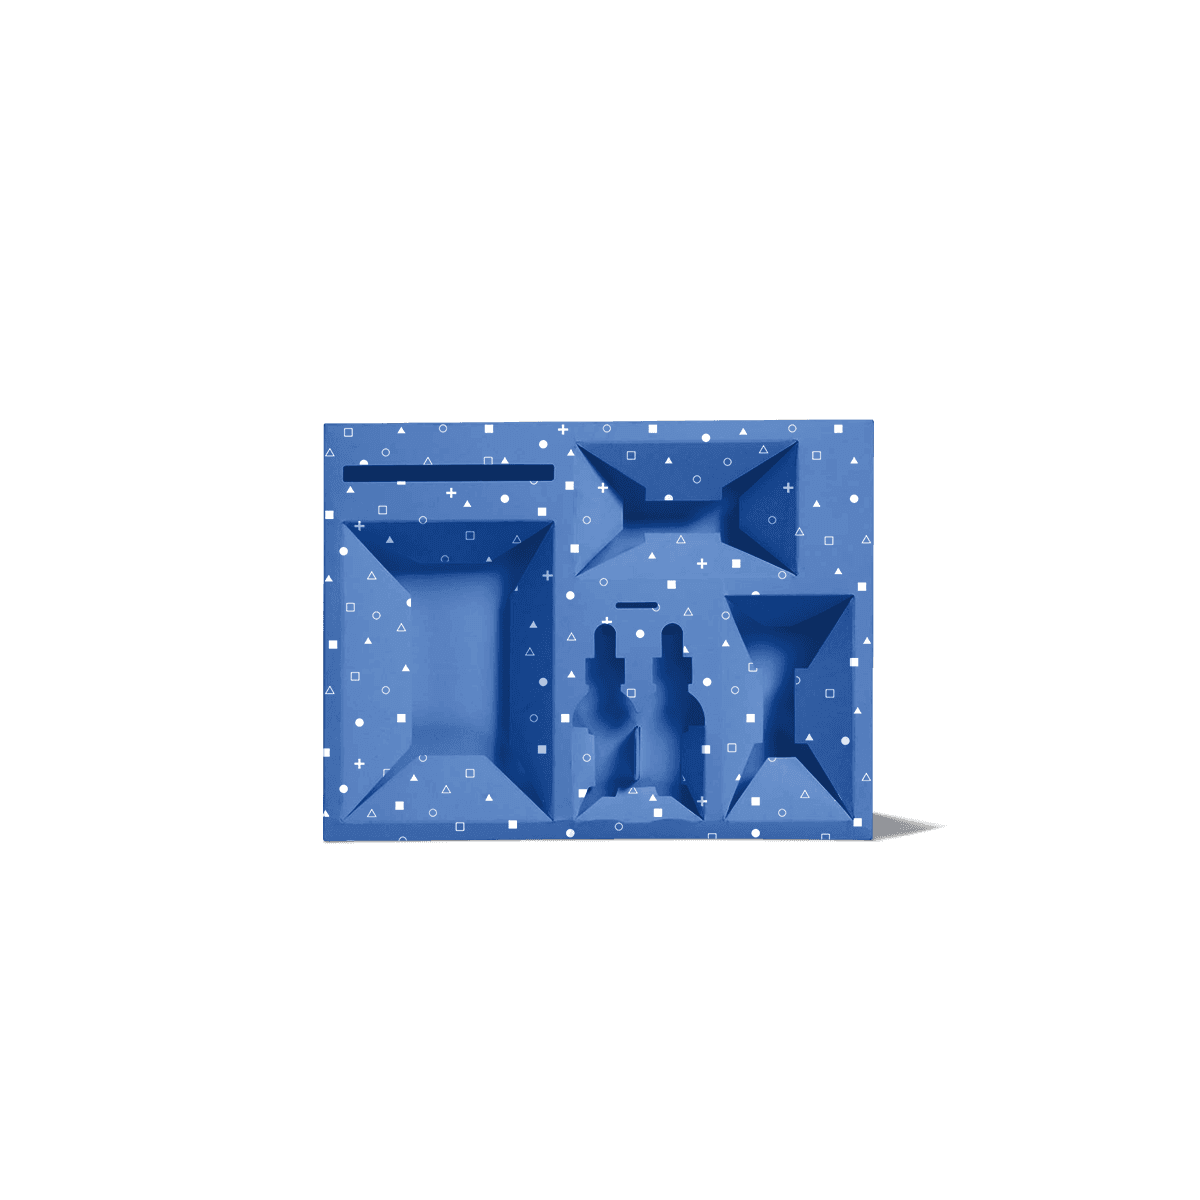
A Cardboard Cradle Insert can make sense when a hero jar or compact needs support from below rather than sitting in a simple flat opening.

Tubes and Tools

Tubes, brushes and applicators are lighter, but they can roll, rotate or sit untidily beside heavier items. Narrow slots or channels can keep them aligned without over-engineering the whole box.

In Makeup Boxes, that separation is useful when palettes, lip products and tools share one kit but need different levels of restraint.

Control More Than Side Movement

An insert can stop a product sliding left and right while still allowing it to lift, tilt or strike the lid. That is not a fully controlled pack.

Check the assembled box in several orientations. Lift it, tilt it and turn it gently. Watch whether glass bottles rise out of their cavities, whether jars lean into neighbouring products and whether the lid becomes the accidental top restraint.

For delivery-led beauty packs, vertical movement matters more because the box will not stay upright throughout its journey. Cosmetic Mailer Boxes can provide the stronger outer role while the cosmetic insert organises the products inside.

A die-cut surface is useful when precise placement and reveal matter. Die Cut Inserts are the more specific structural route when shaped openings, removal access and repeatable product positions are the main requirement.

Sets Need Packing Logic

Multi-product beauty sets should be designed around the person assembling them as well as the customer opening them. A beautiful internal layout can become expensive to pack if every item has to be twisted or forced into position.

Follow the Loading Order

Arrange cavities so products can be placed without the first item blocking access to the next. Heavier jars and bottles should not have to be lifted repeatedly while smaller items are added underneath or beside them.

A clear loading order also makes repeat assembly easier because each position has an obvious purpose.

Make Every Item Removable

Leave enough finger access around products that cannot be gripped easily from the top. Thumb notches, shaped edges or deliberate spacing can make removal cleaner without loosening the whole insert.

The customer should not have to pull a dropper by its cap, pry a compact from one corner or tip the entire box upside down.

Stage the Visual Hierarchy

In a routine or gift set, the most important product can sit slightly higher or occupy the strongest visual position while supporting items remain clearly organised around it.

The point is not to create theatrical empty space. It is to make the relationship between the products understandable as soon as the lid opens.

Paper Support Should Earn Its Space

Paperboard and corrugated insert structures solve different levels of internal support. Choose the lightest structure that controls the actual product safely.

A clean Cardboard Box Insert can work well for lighter cosmetics, sample kits and presentation-led sets. Corrugated support becomes more useful as product weight, box depth or delivery stress increases.

Do not add layers simply to make the inside look more substantial. Extra thickness can enlarge the outer box, increase material use and bury smaller products below the insert surface.

Visible insert panels can carry colour or restrained print where that contributes to the opening experience. Hidden structural tabs usually do not need the same treatment. The available paper-based insert, print and finishing choices can be considered alongside the wider packaging customisation specification.

Size the Box Around the Insert

The insert and outer box form one physical system. The internal dimensions of the box should accommodate the insert in its assembled state with the products already seated inside it.

Do not calculate the box from the product alone and then assume the insert will fit into the remaining space. Folded tabs, raised platforms and cavity walls all consume room.

The same principle applies when working with Rigid Boxes. A deeper rigid presentation box creates more freedom for staged product height, but lid clearance and insert thickness still have to be resolved together.

For folding cartons, the practical sizing process in What Size Tuck Box Do I Need? covers measuring the product and assembled insert as one unit rather than treating them as separate dimensions.

Reuse an Outer Box Carefully

A beauty brand with seasonal kits or changing product combinations may be able to keep one outer box and change the internal insert. That can simplify artwork and create consistency across launches, but it only works when the shared outer footprint still suits the contents.

Plan the outer box around the largest realistic combination, then test whether smaller configurations still feel intentional. If a reduced set leaves large empty areas or forces excessive internal structure, a second box size may be more sensible.

Interchangeable insert layouts are most useful when the products remain close in overall footprint and the outer presentation is meant to stay consistent. They are less useful when one launch contains two small minis and the next contains several full-size glass bottles.

This is a structural decision first. Do not lock the outer carton artwork before the likely set configurations have been reviewed.

Dielines Need Two Checks

Cosmetic insert artwork and outer-box artwork should be reviewed separately even when they are produced as one packaging system.

Check the Insert Flat

Confirm cut lines, fold lines, locking tabs and any printed top surface before production. Finger openings and cavity edges need enough room to work after folding, not just look correct on the flat file.

The general principles in packaging dielines still apply: artwork must respect cuts, creases, bleed and safe areas.

Check the Assembled Fit

A flat dieline cannot prove that the product will sit at the intended height or that two neighbouring items will avoid contact. Assemble the insert with the real products whenever the tolerances matter.

For supported outer box styles, the Dieline Generator can help establish the box template once the required internal footprint is known. It should not be treated as a substitute for checking the insert itself.

Prototype the Whole System

The most useful physical check is not an empty insert. It is the final product, insert and outer box assembled together.

Check whether every item loads without forcing the paperboard, whether labels remain unmarked and whether the lid closes without touching raised components. Then remove each item in the intended order and check that the insert does not lift out with the product.

For ecommerce packs, repeat the check after the box has been tilted and handled. For retail or gifting, pay closer attention to product height, symmetry and the first view after opening.

A paid custom pre-production sample can be useful when glass weight, unusual component shapes, tight cavity tolerances or a multi-level presentation create a physical question that a 3D mockup cannot answer. Free 3D mockups remain useful for checking layout and visual balance before that stage.

Send the Product Layout

For Custom Cosmetic Box Inserts, the strongest quote brief is a product layout rather than a list of generic insert features. Start with a photo or simple sketch showing where each item should sit. Add the finished dimensions and weight of every product, its required orientation and any surface, pump, mirror or cap that should not be used as a contact point.

Then show the outer box if it is already fixed, or state whether the insert is intended for a folding carton, rigid presentation box or ecommerce mailer. Include the number of complete sets required and note whether the same outer box needs more than one insert configuration.

Send the layout through the custom packaging quote together with the outer-box dimensions if they are already fixed. The first costing can then be based on the insert footprint, number of cavities and assembly method rather than a generic overall box size.

FAQs

They become useful when the products inside the box would otherwise move, touch each other or sit unevenly. That often applies to glass bottles, droppers, mirrored compacts and mixed-size beauty sets. A simple carton may be enough for one stable product, but once the pack needs protection, spacing and a more controlled opening layout, inserts usually become the stronger route.

Start with the finished dimensions and weight of every product going into the box, not just the outer box size. Confirm the component shapes, the tallest points, the loading direction and any fragile features such as pumps, mirrors or droppers. It also helps to confirm whether the insert needs to hold leaflets, tools or samples and how the final pack will be shipped after assembly.

For this project direction, paperboard and corrugated-based insert builds are usually the best fit because they stay aligned with paper-led packaging systems. The right grade depends on product weight and the precision needed in the cut-out areas. Lighter products may only need a simple paperboard retainer, while heavier beauty sets often need a more structured insert board to hold the contents securely.

Cosmetic Box Inserts are planned around beauty-product presentation as well as physical support. They often need cleaner spacing, more exact product placement and a stronger focus on the reveal when the box is opened. Cardboard Box Inserts and Die Cut Inserts can support many industries, but cosmetic inserts usually need a more presentation-led internal layout because the products are often giftable, delicate or sold as coordinated sets.

Not if they are planned properly. A good insert should make the inside feel cleaner and more intentional, not crowded. The key is to match the insert depth and cut pattern to the real contents so the pack stays balanced. When the layout is overbuilt, the box can feel wasteful. When it is well judged, the insert improves both protection and perceived quality.

Related Industry Packaging

Process

How it works

Your Packaging Journey, From Idea to Production and Delivery

01

Tell Us Your Specs

Custom packaging boxes

Tell Us Your Specs

Provide size, quantity, printing, and finishes.

02

Get a Fast Quote

Custom packaging boxes

Get a Fast Quote

Instant transparent pricing, no hidden fees.

03

Design and Approval

Custom packaging boxes

Design and Approval

Artwork checks, revisions, and final sign-off.

04

Produce

Custom packaging boxes

Produce

Expert manufacturing to meet deadlines.

05

Ship to Your Door

Custom packaging boxes

Ship to Your Door

Hassle-free, flexible delivery options.

Get Your Quote for Custom Cosmetic Box Inserts

Share your product details, dimensions, quantity and artwork needs. We’ll help choose the right packaging style and send a clear quote.