Skip to content
Details

Custom Mailer Boxes with Wings

Mailer Boxes with Wings add side support to a mailer structure, helping products sit neatly inside the box while improving closure, presentation and delivery stability. They suit ecommerce, subscription and branded product deliveries where the opening experience needs to feel controlled rather than loose.
Dieline preview

Generate a Mailer Box with Wings Dieline

Use custom dimensions to view the dieline for this box style and plan artwork with more confidence.

Bleed
Crease
Trim

No preview available

Mailer Box with Wings

Calibrated controls

Current size315 × 202 × 62 mm
Preview scale100% centered
StateValidated
Next Step

Turn Your Dieline Into Custom Packaging

Share your box size, quantity, material, print and artwork details on the quote page. We’ll review your dieline and email your custom packaging quote with the dieline file.

Continue to quote

Give the Wings a Clear Path

The closing path is the reason to use Custom Mailer Boxes with Wings. As the lid comes down, the side wings move inside the walls to reduce open gaps and help the lid settle cleanly, so the product and insert must leave that path clear.

That closing action is the main reason to choose the style. Within custom mailer boxes, the wings should solve a real containment, alignment or presentation problem rather than being added because the dieline looks more detailed.

The product, tissue and insert all need to stay out of the wing path. If the pack is filled right to the side edges, the extra flaps can become an obstruction rather than an advantage.

Watch the Folding Sweep

A wing does not simply occupy space when the box is closed. It moves through the cavity while the lid comes down.

Check that movement with the actual contents in place. A product can fit perfectly inside the finished dimensions yet still catch a wing during closing.

This matters especially with tall bottles, raised insert trays, folded apparel that reaches the side wall or accessories positioned near the upper corners.

Let the Wings Sit Flat

Once closed, the wings should lie naturally inside the walls rather than buckle, flare outward or push the lid back up.

If they need to be forced past the product on every order, increase the internal clearance or change the internal layout. Making the fold more aggressive is usually the wrong fix.

Side Gaps Need Control

One useful feature of winged mailers is that the lid does not leave the side opening as exposed as a very basic hinged cover. The folding wings extend into those areas and give the closed box a more contained appearance.

That is useful for small components, folded goods and organised sets where the inside should still look controlled after the parcel has been handled.

Containment Is Not Restraint

The wings help close the sides of the lid. They should not be expected to hold a loose product securely in the centre of the box.

If products can slide, turn or collide, control them with closer sizing or inserts and dividers. The wing solves the opening around the lid. The insert solves movement inside the cavity.

Keeping those jobs separate prevents the outer structure from being overcomplicated in an attempt to fix an internal-fit problem.

Do Not Confuse Wings With Strength

Extra folding material around an edge can make the closed mailer feel more composed, but the wings do not determine the overall transit strength.

Product weight, dimensions, corrugated grade, flute and internal support still control whether the parcel is suitable for delivery. When those material questions dominate the brief, custom corrugated mailer boxes should be resolved first.

Set the Wing Clearance Early

A winged lid reduces the usable space around the upper side edges. That clearance should be considered before the insert and product layout are finalised.

Trying to add the wings after the internal arrangement has already filled every millimetre can create rubbing, crushed tissue or an awkward close.

Keep Inserts Inside the Boundary

A fitted insert should sit far enough inside the side walls that the wings can pass beside it.

This becomes important with raised presentation trays. The lower part of the insert may fit correctly while its upper edge projects into the wing path.

Check the insert at its highest and widest points, including folded tabs. A few millimetres of practical clearance can be more useful than making the insert visually flush with every wall.

Control Loose Presentation Layers

Tissue and paper wraps can also interfere with the closing motion. If tissue is part of the presentation, decide where it folds before approving the depth and wing position.

A loose sheet that rises into the side gap can be caught and creased by the wing. A repeatable folding direction keeps the presentation cleaner and makes closing quicker at the packing bench.

Use the Opening as a Frame

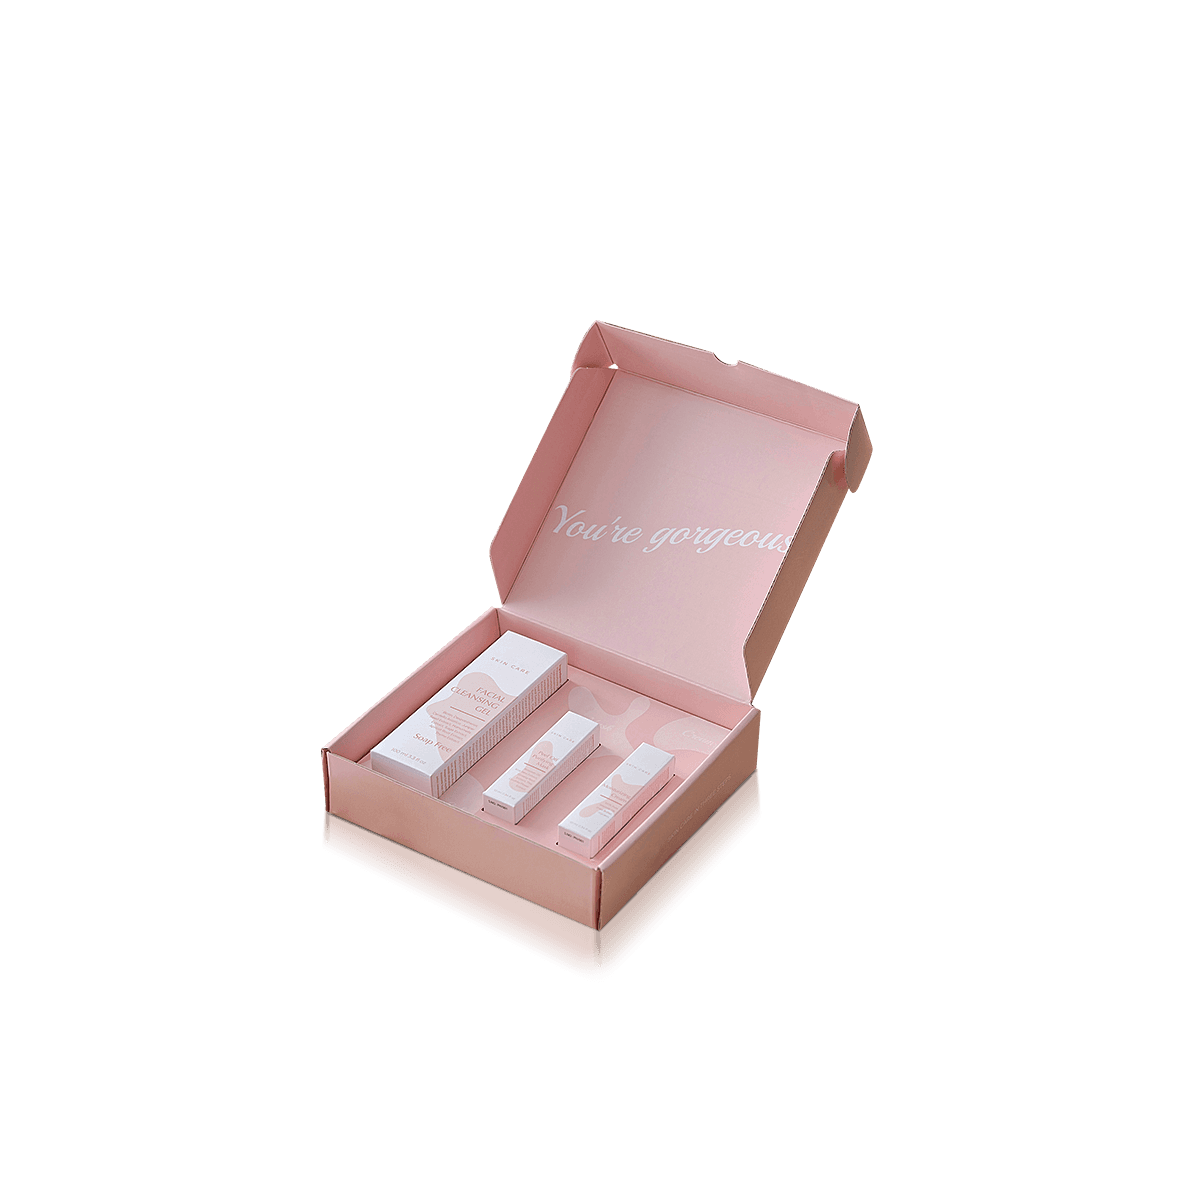
The wings become part of the visual architecture once the lid opens. They can create a more enclosed, framed view of the contents than an open-sided lid arrangement.

That can work well for paired products, presentation sets and orders where the first view needs to stay centred rather than spreading loose items across the cavity.

For recurring multi-item deliveries, subscription mailer boxes need the same balance between controlled presentation and repeat packing.

Keep Important Print Visible

The wing panels themselves may be partly visible when the box is opened, but they are narrow working surfaces. Do not place critical messages where folds or overlaps can hide them.

Use the inside lid for the main opening message and let the wings support the artwork rather than carry information the customer must read.

The wider packaging design principles are useful here: physical structure should decide where artwork belongs rather than treating the opened box as one flat graphic canvas.

Check the Reveal With Contents

An empty 3D mockup can make every internal surface look visible. The real product changes that view.

Tissue, inserts and taller items may cover part of the base or side artwork. Review the opening with the actual product height and presentation layers included before paying for print that disappears behind the contents.

Separate Wings From Rolled Walls

Mailer terminology can be inconsistent, so the dieline matters more than the product name.

A winged mailer uses side wing or dust-wing panels as part of the closing arrangement. A roll end tuck front mailer box uses rolled side-wall panels and a front-tuck-led structure. Both can contain several folded side elements, which is why suppliers sometimes describe them in overlapping ways.

The buyer should therefore compare the actual flat structure, not assume two boxes are different because their names are different.

Choose by the Working Fold

Choose this winged layout when closing the lid with side containment is the feature you need.

Choose RETF when the rolled-wall and front-tuck arrangement better matches the desired side reinforcement and packing sequence. A tuck top mailer box can be simpler again where the extra winged closure adds little value.

The right answer is the structure with the fewest folds needed to control the product and close reliably.

Build From the Actual Dieline

This is one of the mailer styles where the flat layout deserves attention early because the wings affect both closure and artwork.

Custom Packly has a dedicated Mailer Box with Wings dieline in the dieline tool. Entering the intended dimensions gives a useful structural starting point before graphics are placed.

Read the Creases Before Designing

The packaging dieline workflow explains how cut lines, creases, bleed and safe areas relate to the assembled box.

For this style, pay particular attention to the wing creases and the panels directly beside them. Artwork can cross a fold, but small type, fine borders and critical logo details should not depend on perfect visual continuity across a working crease.

Keep Wing Graphics Secondary

The wings turn, overlap and disappear partly into the box during closure. They are therefore poor places for mandatory product information.

Patterns, colour fields or secondary graphics can work better than copy that has to remain fully visible.

Use the large lid and main exterior panels for the strongest visual elements.

Check Closure Before Decoration

A smooth closing action creates more value than another premium finish on a lid that never sits correctly.

Before deciding on foil, spot UV or other surface treatments, confirm that the wings clear the contents, fold consistently and allow the lid to reach its intended final position.

Keep Finishes Off Stress Lines

The wing folds move whenever the box closes. Concentrated finishing across those creases can behave differently from the same effect on a flat panel.

Premium offset printing can provide detailed colour and controlled branding where it suits the run. The wider packaging customisation options can then be chosen around the surfaces that remain stable rather than loading every working fold with decoration.

Print Inside With Intent

Inside printing makes particular sense when the closed exterior needs to stay practical for delivery while the opening carries the stronger brand moment.

A contrasting inside lid, restrained pattern around the cavity or clear product message can create that change without adding loose presentation pieces.

Test the Closing Rhythm

Winged mailers are normally packed repeatedly rather than assembled once for display. The closing movement therefore needs to work at normal fulfilment speed.

Set up several flat blanks and ask the packing team to erect, fill and close them using the intended product arrangement.

Look for Repeated Snags

One caught wing may be a packing error. The same snag on several boxes points to the specification.

Watch for wings rubbing an insert, tissue being trapped, one side folding ahead of the other or the lid needing to be reopened before it seats correctly.

Those problems should be corrected in the structure or internal layout rather than accepted as a training issue.

The fast-turnaround mailer process also shows why solving structural uncertainty before production is more useful than trying to recover time after artwork approval.

Inspect the Contact Points

When the wings pass close to a raised insert, premium product surface or tightly folded tissue, close and reopen a physical sample several times.

Look for scuffing, crushed presentation layers, bent wing edges or repeated rub marks. Use a paid custom sample when those contact points cannot be judged accurately from the 3D mockup.

Wings Must Earn Their Fold

Not every ecommerce mailer benefits from additional closing panels.

A soft garment already filling a simple mailer neatly may not need them. A heavy product whose real issue is transit strength will not become suitable simply because the lid has wings. A very tight insert layout may actually become easier to pack without another panel moving through the cavity.

The main box-type decision should come back to function: protection, closing behaviour, presentation, packing speed and delivery route.

Choose the winged version when it gives a cleaner side closure or better controlled reveal. Leave it out when the simpler structure performs just as well.

Quote the Closing Geometry

For this style, the useful pricing brief should explain what sits near the wings. Share the required internal dimensions, packed product height and width, any insert footprint and whether tissue or other presentation layers reach the side walls.

Also explain what you want the wings to achieve: reduced side gaps, a tidier reveal, cleaner lid guidance or better containment around a multi-item arrangement. That gives the structure a clearer purpose than simply requesting “a mailer with extra flaps”.

Attach or reference the actual winged dieline when pricing. That prevents a simpler mailer or a different roll-end structure being quoted under the same loose product name.

If supplier prices are being compared, make sure every quote is based on the same dieline and wing arrangement. The mailer quote checks help identify structural or print differences that can otherwise look like simple price variation.

Once wing clearance, internal size and print coverage are fixed, request instant pricing for that exact winged structure.

FAQs

The wings mainly improve side support, lid guidance and the opening feel. They can help the structure feel more stable, but they do not replace the need for the right corrugated board grade. For heavier products, strength still depends on flute choice, board quality, box size, product weight and how the contents are supported inside.

A winged mailer is better when the delivery needs a tidier reveal, reduced side gaps and a more finished look inside the box. A standard tuck mailer can still work well for simple fulfilment, lower-cost dispatch or plain postal use. Choose the winged version when branded presentation matters alongside delivery practicality.

Yes, both the outside and inside can be printed depending on the board surface and artwork plan. Exterior print helps with brand recognition during delivery, while interior print supports the reveal after opening. Keep artwork clear around folds, wing panels and tuck areas so key graphics do not disappear into crease lines.

They suit lightweight and medium-weight products that benefit from a neat postal presentation. Common uses include skincare sets, small accessories, folded apparel, samples, stationery, subscription items and promotional deliveries. Very fragile products may need inserts, dividers or extra cushioning so the wings support presentation rather than acting as the main protection.

Confirm product dimensions, total packed weight, insert depth, tissue or filler use, front tuck position, artwork placement and whether the box needs to pass through a specific postal size. It also helps to test the packing sequence. If the wings slow packing or press against the product, the dieline should be adjusted before production.

Process

How it works

Your Packaging Journey, From Idea to Production and Delivery

01

Tell Us Your Specs

Custom packaging boxes

Tell Us Your Specs

Provide size, quantity, printing, and finishes.

02

Get a Fast Quote

Custom packaging boxes

Get a Fast Quote

Instant transparent pricing, no hidden fees.

03

Design and Approval

Custom packaging boxes

Design and Approval

Artwork checks, revisions, and final sign-off.

04

Produce

Custom packaging boxes

Produce

Expert manufacturing to meet deadlines.

05

Ship to Your Door

Custom packaging boxes

Ship to Your Door

Hassle-free, flexible delivery options.

Get Your Quote for Custom Mailer Boxes with Wings

Share your product details, dimensions, quantity and artwork needs. We’ll help choose the right packaging style and send a clear quote.